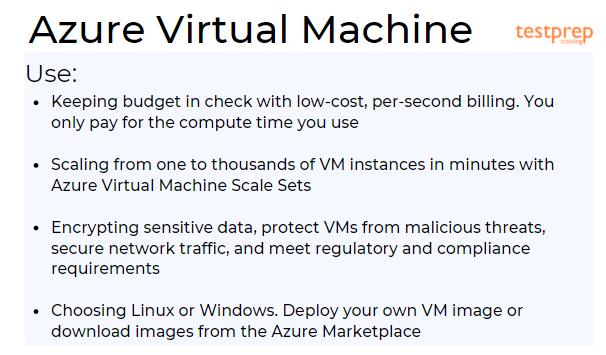
Azure Virtual Machine is always useful for migrating your business- and mission-critical workloads to Azure infrastructure and improve operational efficiency. These are one of several types of on-demand, scalable computing resources that Azure provides. However, commonly, VM’s are needed when we want more control over the computing environment.

Further, Azure VM provides the flexibility of virtualization without any requirement for buying and maintaining the physical hardware running it. But, it is important to maintain the VM by executing tasks like configuring, patching, and installing the software running on it. Azure virtual machines can be used in many ways:
- Firstly, Development and test
- Secondly, Applications in the cloud
- Lastly, Extended datacenter
Coming on to the main point, in this blog, we will learn about how to create a virtual machine in Azure Portal. But, before proceeding towards it, let’s understand the important things to be considered before creating a VM.
Things to consider before creating a VM:
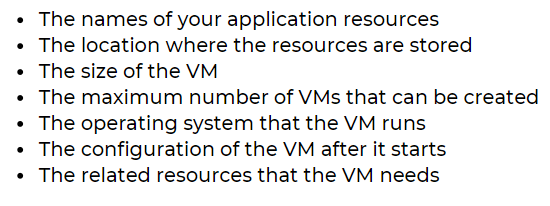
There is always a multitude of design considerations while creating an application infrastructure in Azure. However, these aspects of a VM are important to consider before beginning:

1. Locations
All resources built-in Azure are distributed over multiple geographical regions globally. Basically, the region is known as the location when you build a VM. However, for a VM, the location defines where the virtual hard disks are stored. Further, some of the ways to get a list of available locations.
- Azure portal
- Selecting a location from the list when you create a VM.
- Azure PowerShell
- Using the Get-AzLocation command.
- REST API
- Using the List locations operation.
- Azure CLI
- Using the az account list-locations operation.
2. Availability
Azure declared an industry-leading single instance virtual machine Service Level Agreement of 99.9% offered for deploying the VM with premium storage for all disks. However, it is necessary to deploy two or more VMs running your workload inside an availability set for deployment for qualifying the standard 99.95% VM Service Level Agreement. Here, an availability set makes sure that your VMs are allocated over multiple fault domains in the Azure data centers and also deployed onto hosts with different maintenance windows.
3. VM size
The size of the VM that you use is decided by the workload you want to run. However, the size that you select then controls factors like processing power, memory, and storage capacity. Azure offers a large variety of sizes for supporting many types of uses.
You must know that Azure charges an hourly price depending on the VM’s size and operating system. Further, for partial hours, Azure charges only for the minutes used. Storage is priced and charged separately.
4. VM Limits
The subscription has default quota limits in place that could affect the deployment of many VMs for your project. However, the current limit on a per subscription basis is 20 VMs per region. These limits can be increased by filing a support ticket requesting an increase
Operating system disks and images:
Virtual machines use virtual hard disks (VHDs) for storing operating systems (OS) and data. VHDs are also used for the images you can select from to install an OS. Further, Azure offers many marketplace images for using them with various versions and types of Windows Server operating systems. Marketplace images are recognized by image publisher, offer, SKU, and version.
Extensions:
VM extensions provide VM additional capabilities through post-deployment configuration and automated tasks. These common tasks can be achieved using extensions:
- Firstly, Running custom scripts. The Custom Script Extension helps in configuring workloads on the VM by running script when the VM is provisioned.
- Secondly, Deploying and managing configurations. The PowerShell Desired State Configuration (DSC) Extension helps in setting up DSC on a VM for managing configurations and environments.
- Lastly, Collecting diagnostics data. The Azure Diagnostics Extension helps in configuring the VM for collecting diagnostics data that can be used for monitoring the health of the application.
Related resources:
The resources below are used by the VM and require to exist or be created when the VM is created.
- Resource group
- The VM must be contained in a resource group.
- Storage account
- The VM requires the storage account for storing its virtual hard disks.
- Virtual network
- The VM must be a member of a virtual network.
- Public IP address
- The VM can have a public IP address allocated to it to remotely access it.
- Network interface
- The VM requires the network interface for communicating in the network.
- Data disks
- The VM can include data disks for expanding storage capabilities.
Above we have covered the basics about Azure Virtual Machines. In the next section, we will learn how to create a Windows Virtual machine in Azure Portal.
Creating a Windows virtual machine in the Azure portal
Azure virtual machines (VMs) can be created using the Azure portal. This technique provides a browser-based user interface for creating VMs and their linked resources.
Before beginning, remember to create a free account if you don’t have an Azure subscription. Then, log in to the Azure portal.
Creating virtual machine
- Firstly, type virtual machines in the search.
- Secondly, select Virtual machines under Services.
- Thirdly, select Add then Virtual machine in the Virtual machines page.
- Fourthly, ensure that the correct subscription is selected in the Basics tab, under Project details. Then, select Create new resource group. Here, for the name type myResourceGroup.

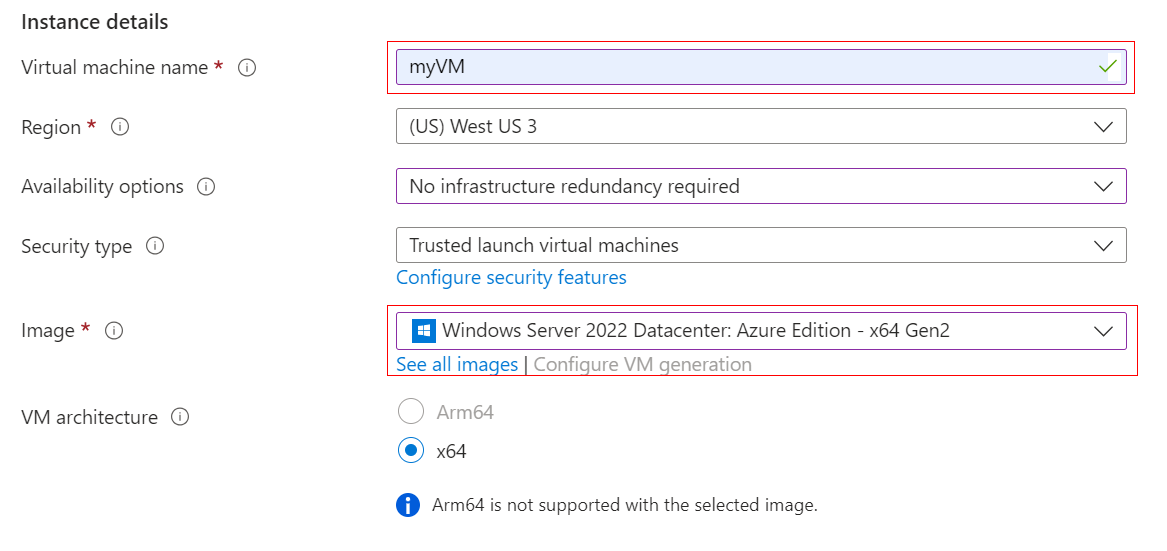
- Next, type myVM for the Virtual machine name under Instance details and choose East US for your Region. Then, select Windows Server 2019 Datacenter for the Image and Standard_DS1_v2 for the Size. Leave the rest defaults.

- After that, provide a username under an Administrator account. This can be azureuser. Then, provide a password that must be at least 12 characters long and meet the defined complexity requirements.

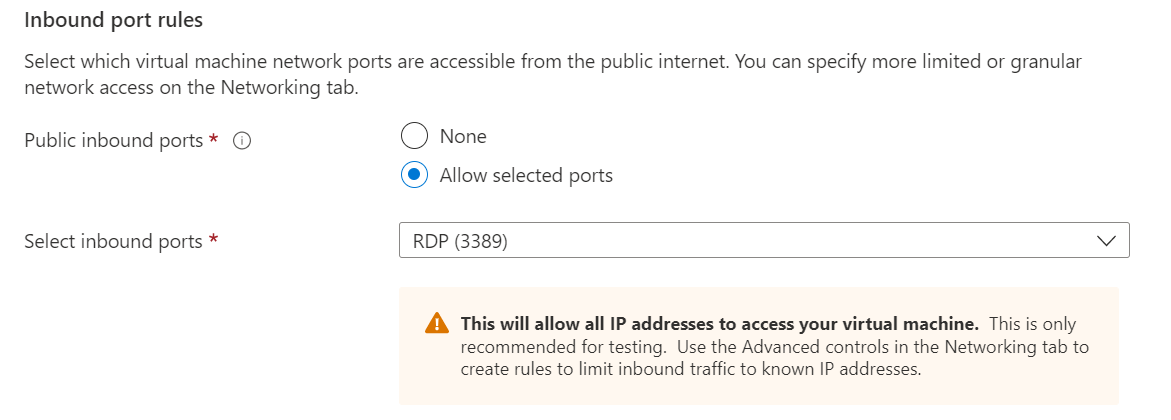
- Now, select Allow selected ports under Inbound port rules and then from the drop-down select RDP (3389) and HTTP (80).

- Then, leave the remaining defaults and at the bottom of the page select the Review + create button.

- Next, select the Create button at the bottom of the page after validation runs.
- Lastly, after completing the deployment, select Go to the resource.

Things to know:
- Firstly, Azure offers a default outbound access IP for Azure Virtual Machines. These are not allocated with a public IP address or are in the backend pool of an internal Basic Azure Load Balancer.
- Secondly, this default outbound access IP mechanism provides an outbound IP address that cannot be configured.
- Thirdly, when a public IP address is allocated to the virtual machine or the virtual machine is placed in the backend pool of a Standard Load Balancer with or without outbound rules the default outbound access IP is disabled .
- Lastly, the default outbound access IP is disabled if an Azure Virtual Network NAT gateway resource is allocated to the subnet of the virtual machine.
Connecting to the virtual machine
Creating a remote desktop connection to the virtual machine. These directions will explain the process of connecting to your VM from a Windows computer. However, on a Mac, you must have an RDP client like Remote Desktop Client from the Mac App Store.
- Firstly, select the Connect button on the overview page for your virtual machine and then select RDP.

- Secondly, keep the default options to connect by IP address, over port 3389 in the Connect with RDP page. And, then, click Download RDP file.
- Thirdly, open the downloaded RDP file and click Connect when prompted.
- Then, select More choices in the Windows Security window and then use a different account. Here, type the username as localhost\username. Also you have to enter the password you created for the virtual machine, and click OK.
- Lastly, you will receive a certificate warning during the sign-in process. Click Yes or Continue for creating the connection.
Installing web server
For seeing VM in action, install the IIS web server. After that, open a PowerShell prompt on the VM. Then, run the given command:
PowerShell
Install-WindowsFeature -name Web-Server -IncludeManagementTools
When finished, close the RDP connection to the VM.
Viewing the IIS welcome page
In the portal, choose VM and in the overview of the VM, hover over the IP address for showing Copy to clipboard. Then, copy the IP address and paste it into a browser tab. However, the default IIS welcome page will open:

Cleaning up resources
For deleting the resource group, virtual machine, and all related resources.
- Firstly, go to the resource group for the virtual machine.
- Secondly, select the Delete resource group.
- Lastly, confirm the name of the resource group for finishing deleting the resources.
Final Words
Above we have learned the process of creating a VM using Azure Portal. Go through the blog to understand the steps and use Microsoft Documentations to get clarity. By providing scalable solutions for optimizing infrastructure, saving money, and monitoring VM environments, Azure Virtual Machines has created a huge impact globally. So, get yourself started with VM.


